
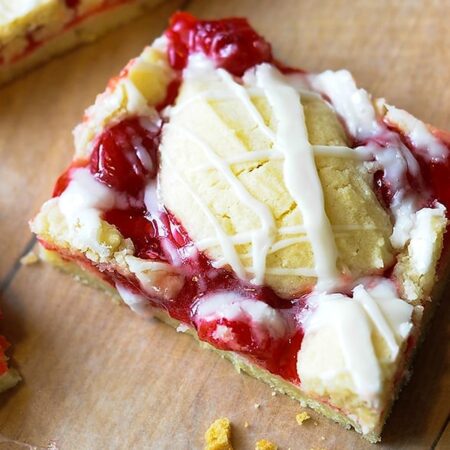
My grandpa almost always had a half-eaten cherry pie in his kitchen, so these buttery, glazed Cherry Pie Bars feel like home to me.

save this!
Want this recipe?
I’ll email it straight to your inbox!
Plus my weekly recipes. Unsubscribe anytime.
That love of cherries stuck with me. My mom and I found this recipe in a holiday baking edition of Better Homes and Gardens, where it was called Cherry Kuchen Bars, and we made the first batch together.
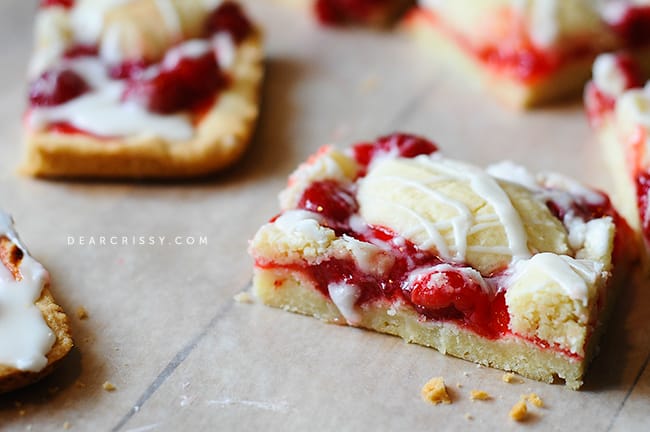
To make this recipe, I press a soft, cookie-like dough into a big pan, spread on cherry pie filling and dot more dough over the top.
A sweet glaze finishes them off, and every square tastes like classic cherry pie you can pick up with your hand.
What You’ll Learn
- How I use one simple dough for the crust and topping.
- Why I save some dough before anything goes in the pan.
- Easy filling swaps my readers love, from apple to blueberry.
- How I store these bars, and how to keep the glaze from soaking in.
Why You’ll Love These Bars
When I need cherry bars for a crowd, this is the recipe I reach for. There’s no pie crust to roll out and no lattice to weave. One big pan gives you neat squares that travel well.
The buttery crust bakes up moist and chewy with a little crisp around the edges, somewhere between cookie bars and a fruit pie. They’re sweet, but not too sweet. I usually send them to work with my husband, or I’d eat half the pan myself.
Readers have told me these disappear at church brunches, school potlucks and bridal showers. Some serve them with vanilla ice cream, and one reader has them for breakfast with scrambled eggs. I’m not judging!
The red cherries and white glaze also make these pretty Christmas cherry bars for a holiday dessert table.

You may also know these as cherry bars or cherry squares with cherry pie filling.
There’s something special about cherry pie filling. I love desserts with fresh fruit, but a recipe made with a good ol’ can of pie filling is familiar, comforting and a great shortcut.
If you want an easy cherry bars recipe that starts with your pantry, this is it.
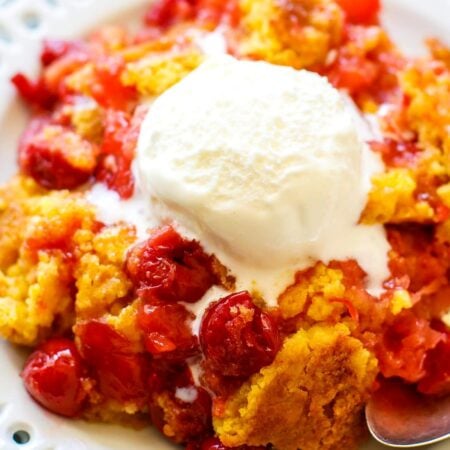
If you love cherry desserts as much as I do, my Cherry Dump Cake and Cherry Bliss Brownies should be next on your list.
Cherry Pie Bars Ingredient Notes
You probably have most of this in your pantry already, so I’ll just point out the few things that matter.
Cherry pie filling: I use regular canned cherry pie filling from the baking aisle. That means no pitting and no cooking, which is my kind of baking.
Butter and shortening: I use both. Softened butter brings the flavor, so don’t use melted butter here. Salted or unsalted butter both work. By shortening, I mean the solid kind like Crisco, not liquid oil.
Vanilla and almond extract: Vanilla extract goes in the dough. The glaze can take either one, and readers say the almond is a lovely match for the cherries.
Powdered sugar: Powdered sugar, also called confectioners sugar, is the base of the glaze. A little milk and a little extract are all it needs.
How to Make Cherry Pie Bars
First, preheat oven to 350 degrees and grab your biggest mixing bowl. I cream together the butter and shortening with an electric mixer, then beat in the granulated sugar, baking powder, large eggs and vanilla extract.
The all-purpose flour goes in last, and the dough turns thick like cookie dough.
It won’t look light and fluffy, and that’s fine. Set some of the dough aside, then press the remaining dough into an ungreased 15×10-inch baking pan. The crust goes in the oven by itself first for a head start.
Next, spread the cherry filling over the crust and spoon the saved dough on top in small mounds. Bake until the top is a light golden brown. After a short rest in the pan, drizzle on the glaze and cut your bars.
I put every amount and step in the recipe card at the bottom of this post, so grab it before you head to the store.
save this!
I’ll email it, plus my weekly recipes.
My Best Tips
- Save the dough first. This Cherry Pie Bars recipe uses the same dough for the crust and topping, so set your topping aside before you start pressing.
- Flour your fingers. This dough is soft and a little sticky. A bit of flour on your fingers helps you press it evenly into the corners.
- Keep the mounds small. They spread as they bake, so leave gaps for the cherries to peek through. It isn’t a crumble topping, and it shouldn’t cover everything.
- Watch the first bake. One reader told me the bottom crust got too dark. Check yours a little early, especially in a dark pan.
- Use a sharp knife. A sharp knife gives you clean edges. Wipe it between cuts so the filling doesn’t drag across the glaze.
Substitutions & Variations
Other pie fillings: Cherry isn’t your only choice. Readers have made these with apple, peach, raspberry and blueberry pie filling, and some use one can each of two flavors. If apple is your favorite, try my Apple Pie Bites too.
Homemade cherry pie filling: A few of my readers use their own filling, including one who bakes with fresh cherries from a family farm.
Fresh or frozen cherries should both work, whether they’re sweet cherries or sour cherries. Cook them with sugar, cornstarch and a little lemon juice until thick, and let the filling cool first.
Cream cheese layer: One reader spreads cream cheese between the crust and the filling. I love anything cheesecake, so that sounds like a great idea to me. If you do too, my Oreo Cheesecake Bars are another good one.
A smaller pan: One reader used a 9×13-inch baking dish because it was the biggest pan on hand, and the bars turned out great. Your bars will be thicker, so plan on a little extra oven time.
How to Store Leftovers
Make ahead: Cherry bars with cherry pie filling keep well, so you can bake these a day ahead. Keep them covered and cut them when you’re ready to serve.
Room temperature: Keep the bars covered or in an airtight container at room temperature for up to 2 days.
Refrigerator: After that, move them to the refrigerator for up to a week. The glaze may soften a little.
Freezer: Readers ask about this a lot. I haven’t frozen these myself, but bars like this generally freeze well.
Let them cool completely, skip the glaze and freeze them in an airtight container for up to 3 months. Thaw them in the refrigerator and add fresh glaze.
Cherry Pie Bars FAQs
Do I grease the pan for Cherry Pie Bars?
No. The pan stays ungreased because the dough has plenty of butter and shortening in it. If that makes you nervous, line the pan with parchment paper so you can lift the whole batch out.
Can I use two cans of pie filling in Cherry Pie Bars?
Yes. One can makes a thin fruit layer in a pan this big, and a lot of my readers use two cans for more filling in every bite. Your bars may need a little extra time in the oven.
Can I make Cherry Pie Bars with canned cherries?
Yes, but plain canned cherries are too thin to use as they are. Drain them, then cook them with sugar and cornstarch until thick, and let them cool before you spread them on the crust.
Can I use all butter instead of shortening?
It should work, though I always make them with both, so that’s what I recommend. All butter will taste great, but the bars may spread and brown a little more.
How do I keep the glaze from soaking into Cherry Pie Bars?
Give the bars a short rest before you drizzle, because glaze soaks right into very hot bars. Keep the glaze on the thick side, too. Add the milk slowly, and stop as soon as it falls off your spoon in a ribbon.
The next time someone asks you to bring dessert, grab a can of cherry pie filling and make these easy Cherry Pie Bars. I like to think my grandpa would have asked for seconds!
More Dessert Bars
- Chocolate Raspberry Bars
- Chewy Pecan Pie Bars
- Cake Mix Cookie Bars
- Coconut Magic Bars
- Oreo Cheesecake Bars
Cherry Pie Bars
Ingredients
- ½ cup butter softened
- ½ cup shortening
- 1¾ cups sugar
- 1½ teaspoons baking powder
- ½ teaspoon salt
- 3 eggs
- 1 teaspoon vanilla
- 3 cups all purpose flour
- 1 can cherry pie filling 21 ounces, or substitute your favorite
Powdered Sugar Icing:
- 1½ cups powdered sugar
- ¼ teaspoon vanilla or almond extract
- 2 to 3 tablespoons milk make a drizzle consistency
Instructions
- Preheat oven to 350 degrees. In a large bowl beat butter and shortening with an electric mixer on medium speed for 30 seconds. Add sugar, baking powder and salt. Beat until combined, scraping side of bowl occasionally. Beat in eggs and vanilla until combined. Beat in as much of the flour as you can with the mixer. Using a wooden spoon, stir in any remaining flour. Reserve 1 ½ cups of the dough. Press the remaining dough onto the bottom of an ungreased 15x10x1-inch baking pan.
- Bake for 12 minutes. Remove, then spread pie filling over crust in pan. Spoon reserved dough into small mounds over pie filling.
- Bake an additional 30 minutes or until top is light brown. Cool in pan on a wire rack for 10 minutes. Stir the powdered sugar, extract and milk until smooth, then drizzle over the bars. Cut and serve.
Notes
Nutrition
Nutrition is an estimate from an online calculator, not medical advice, and depends on your portion size.


A gift for you
deck the halls
Free recipe book
One little book, twelve recipes, zero guessing. Every recipe printable, freezer chart included. Free.
It’s on its way! Check your inbox (and Promotions) for your free cookbook.
Free. Unsubscribe anytime.

Can you freeze these???
Are you very certain that one DOES NOT grease the pan??? I am ready to put in my pan as
you designate and apprehensive, because the pan is not greased????????
Hoping you can answer right away now.
Thanks so much.
Marlene
I love these!! Thanks for sharing. I grease the pan, add almond to the mixture, cook for about 22 minutes after I put the filling on.
Just made this recipe with my ‘made from scratch’ apple pie filling. It is delish and not too sweet. Thanks for sharing this great recipe!
Is it one can of filling or two? I’m in the process of making these and it doesn’t seem like there’s enough cherry to cover the crust.
I only used one and it did just fine for me, but my biggest pan was a 13×9. They turned out divine!
I am from North Dakota where Kuchen is very common and along with fruit filling you can also fill with something that tastes a lot like cream cheese/custard mix. I love them them ! They will commonly add chocolate chips, nuts etc. I would assume that it would be pretty similar in a bar. You’d have to check the internet to see what the filling is as I buy them not make them . :)
I make those that you are talking about and it is an egg custard. Pretty simple and so yummy
I used to make a bar similar to this one that was one of my go to recipes but sadly I lost the recipe several years ago. I would also make them with apple pie filling in the fall and sometimes blueberry.
I can’t wait to give these a try.
Gorgeous bars. I would definitely say that these are magazine-quality. So pretty with the bright red cherries peeking out! I’ll bet they taste even better than they look!
I’m wondering how you got your glaze to be so white. My was clear. Did I add too much milk?
Hey Chelsea! I trick I’ve learned with glaze like this is to make it fairly thick, too thick to pour, and then heat it slightly in the microwave till it gets that runny consistency. Pour it on your bars (or scones,etc) and leave it for five minutes. When the glaze hardens it will be white and not as sticky. :)
I just made these…delish!! Unfortunately no pics, though!
Do you know what the cook time would be if I used a 13 x 9 cake pan? We can’t find a 15 x 10 x 1 anywhere and we want to make these for Thanksgiving.
I just made these in a 9×13″ pan, as I too did not have the 15×10″ pan. I baked them the first time as directed 12 minutes, then the last part 35 minutes. They do seem just slightly overdone and a bit dry, so next time I may just use the same time as written.
And, needless to say, they are spectacular! I added some almond extract to the cake batter too, simply because I adore almond. This is a keeper and oh so pretty!